How To Install Laserlite Roofing

Polycarbonate Roof Panels On Pergola Pergola Pergola Ideas For Patio Pergola Plans
How To Install Polycarbonate Roofing Sheets Youtube

From Colorbond To Polycarbonate Laserlite To A Tiled Flat Roof Verandah Or A Open Flat Roof Pergola We Have The Roof Design F Roof Design Pergola Flat Roof

Laserlite Roofing Over Merbau Decking Fs Jpg 600 338 Merbau Decking Pergola Outdoor Living

Laserlite Multiwall Installation Guide With Tips Polycarbonate Roofing

How To Install Polycarbonate Roofing Youtube

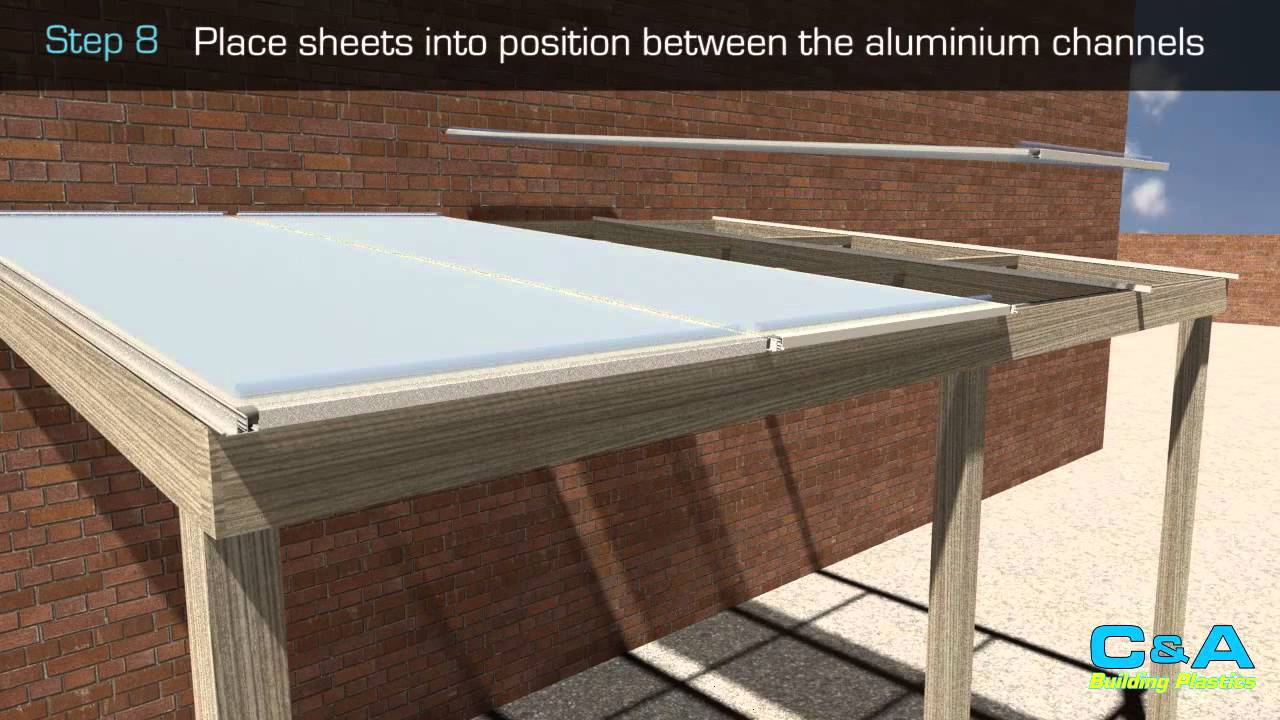
Fix the sheet through the crests for roofing with laserlite one shot fixings and through the valleys for walls with laserlite fixings for cladding or laserlite standard fixings.
How to install laserlite roofing.

Build A Decorative Timber Awning Diy Awning Awning Over Door Front Door Awning

Sold Price For 21 Boomerang Road Collaroy Plateau Nsw 2097 Pergola Patio Backyard Small Backyard Landscaping

Laserlite Twinwall Polycarbonate Sheeting Supplies Roof Design Outdoor Pergola Pergola With Roof
How To Build A Patio Roof With Polycarbonate Sheets Installation Guide Eplastusa
From Colorbond To Polycarbonate Laserlite To A Tiled Flat Roof Verandah Or A Open Flat Roof Pergola We Have The Roof Pergola Pergola Patio Outdoor Pergola

Replacing A Polycarbonate Plastic Roof Pergola Building A Pergola Pergola Plans

How To Install Renshade Screens Under A Polycarbonate Pergola By Ecomaster Youtube

Pin By Claudita Lomas On Transferencia De Fotos In 2020 Pergola Pergola Plans Pergola Designs

Polycarbonate Guides And Faqs Polycarbonate Roofing
Combine Pergola Roofing Options For Lighting Control Softwoods Pergola Decking Fencing Carports Roofing
Polycarbonate Roofing Sheets How To Install Softwoods Pergola Decking Fencing Carports Roofing

Glasshouse Made From Recycled Windows Laserlite Roof Works A Treat Freshwatercreekcottages Farmstay Www Fwcreek With Images Recycled Windows Farm Stay Glass House

Laserlite Gabled Roof Pergola Pictures Pergola Building A Pergola

Flat Pergolas Lg 009 Jpg 720 533 Pergola Roof Design Alfresco

Polycarbonate Roofing Sheets Greca Australia Metal Roofing Roofing Sheets Metal Roof

Polycarbonate Roofing Polycarbonate Roofing Panels Installation

How To Clean Your Polycarbonate Roof Tuflite Polycarbonate Roof Water Storage Tanks

How To Bend Polycarbonate Sheet Polycarbonate Polycarbonate Panels Pool Enclosures
Https Encrypted Tbn0 Gstatic Com Images Q Tbn 3aand9gcshimpkabmjjjlb4matyymqjtvtifgv2bp95if7fbi Usqp Cau

Image Result For Pergola Roofing With Colorbond And Laserlite Panels Outdoor Pergola Pergola Pergola Plans

How To Cut Suntuf Youtube

Absco Sheds 5 5 X 5 5 X 2 25m Zincalume Skillion Roof Double Carport Naves

Suntuf Installation Guide And Tips Polycarbonate Roofing

Things To Consider With Flat Roof Pergolas House Exterior House Roof Flat Roof
Source : pinterest.com
