How To Install Vent Pipe Flashing On Flat Existing Roof

How To Install Vent Pipe Flashing On An Existing Roof Tools Materials

New Vent Flashing On Existing Mineral Rolled Roof Roofing Siding Diy Home Improvement Diychatroom

Pin On Outside

How To Install An Epdm Pipe Boot On A Rubber Roof From Rubber4roofs Youtube

Pin On Roof

Plumbing Vent Boot On Roof Shingles Plumbing Vent Asphalt Roof Shingles Modern Roofing

In simplest terms a new vent pipe boot flashing is slid over the top of the existing one and the top edge of the pan is lapped beneath the overlying shingle course.
How to install vent pipe flashing on flat existing roof.

How To Fit A Vent Pipe Detail On A Flat Roof Rubber Roofing Made Easy Youtube

How To Install A Roof Vent Flashing For A Furnace Chimney Youtube

Guide On How To Repair Your Roof Home Improvement Projects Home Improvement Plumbing Vent

Pin On Front Porch

How To Install Roll Roofing With Your Own Hands Roll Roofing Flat Roof Fibreglass Roof
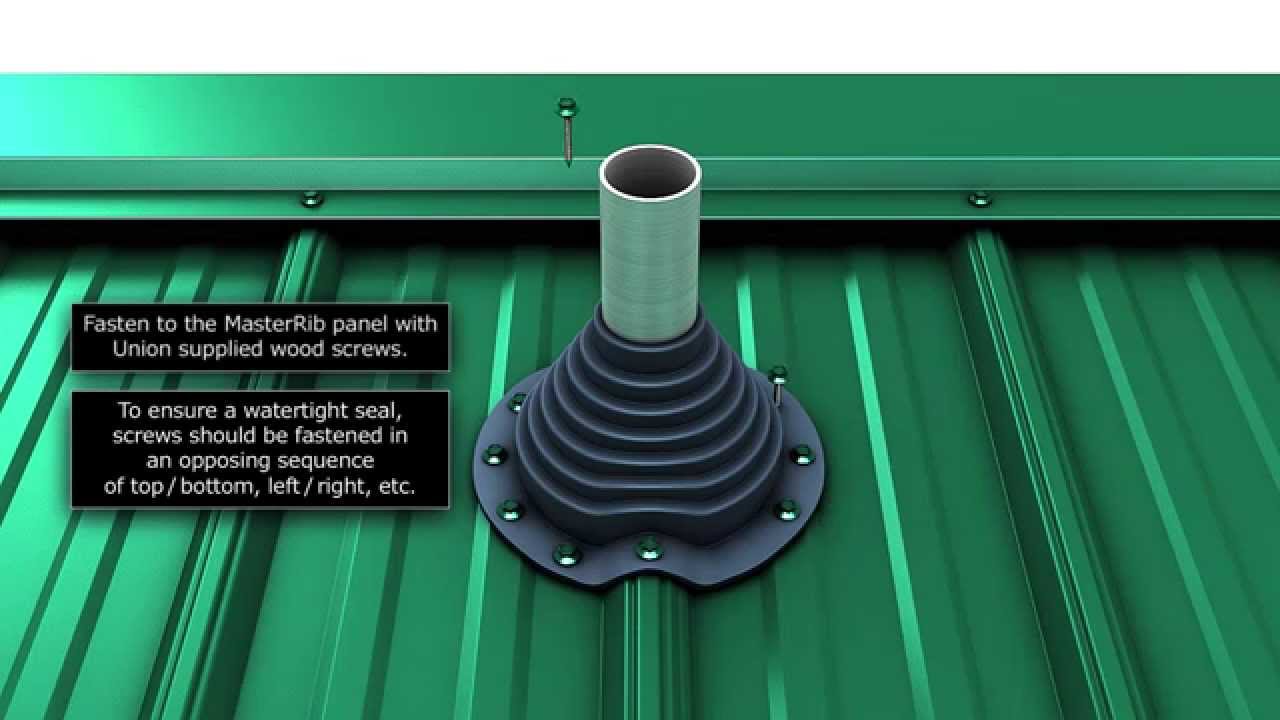
Metal Roof Vent Sealer Adapter Master Flash For Installing Turbines On Metal Roofs Metal Roof Vents Metal Roof Roof Vents
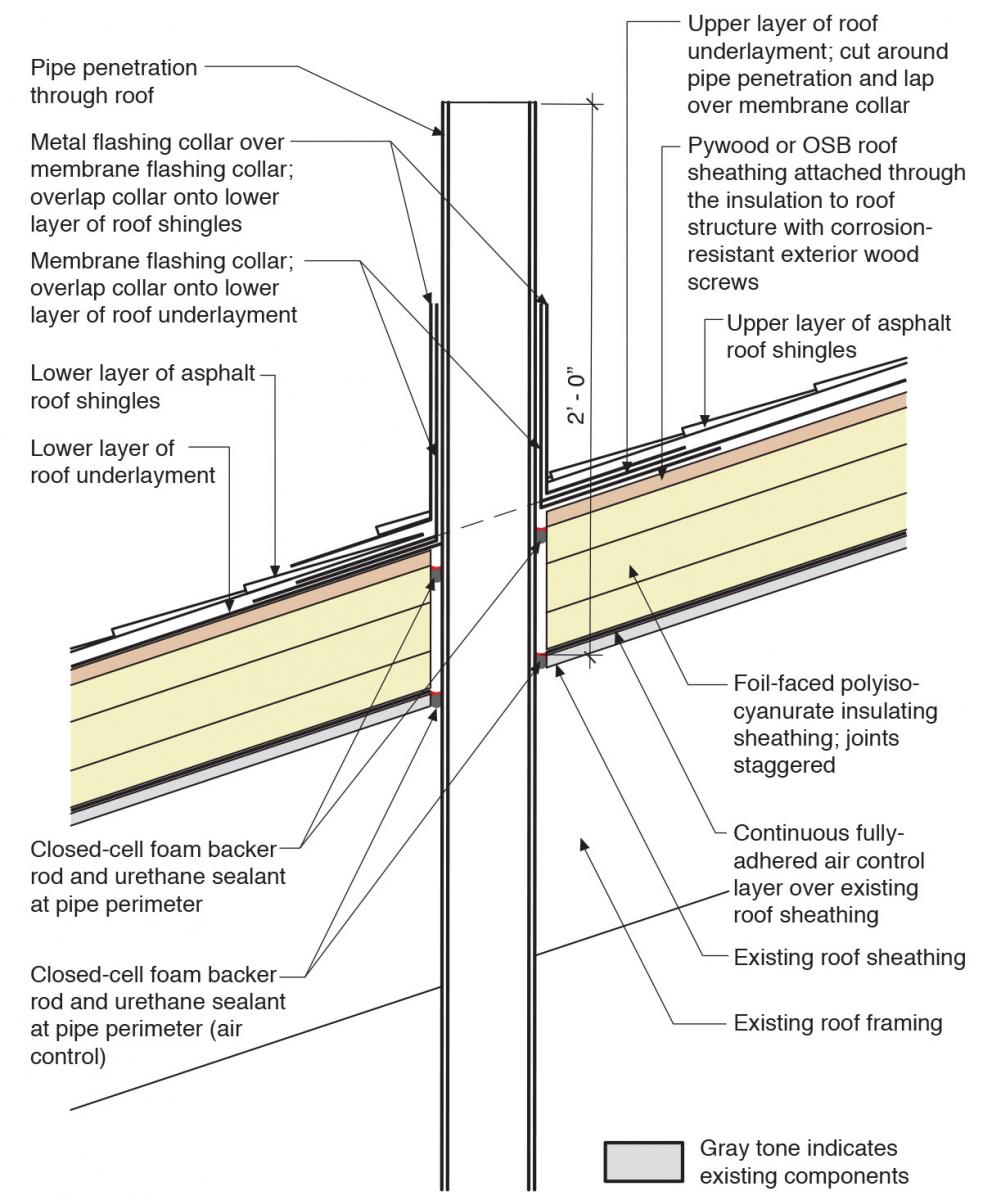
Flashing Of Penetrations In Existing Roofs Building America Solution Center

Pin On Metal Roof

Installing Vent In Flat Roof Roofing Siding Diy Home Improvement Diychatroom
How To Install A Metal Roof Pipe Boot Youtube

How To Install A Pipe Boot On Your Roof Youtube

Pin On Wood Stove Fireplace

Rapid Materials Hering Ideen Designer

Rotating Roof Vent Vs Ridge Vent Which Is Best The Money Pit Roof Vents Ridge Vent Attic Ventilation

Pin On Stove

Gutter Dimensional Roof Shingles Roofing Accessories Tile Modified Bitumen Contractor Talk Firestone Metal Systems C Roof Installation Roof Drip Edge Shingling
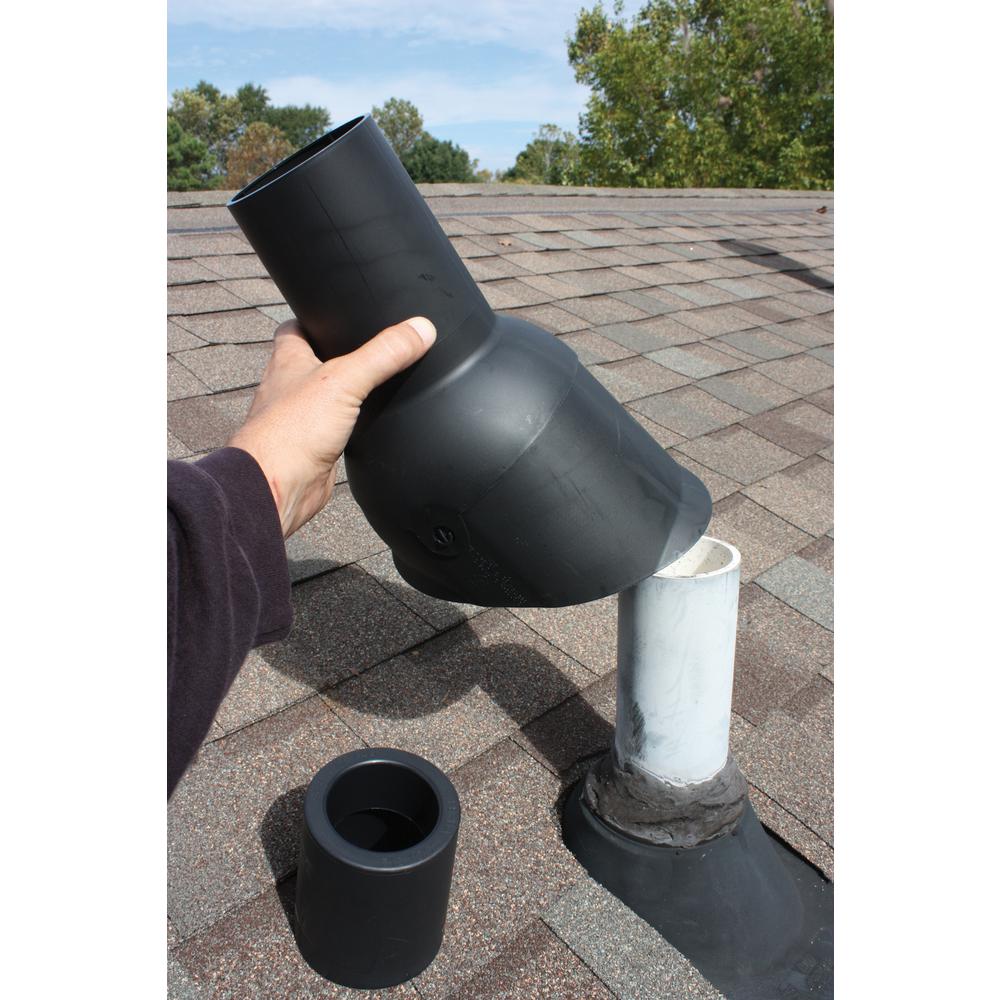
Perma Boot Pipe Boot Repair For 2 In I D Vent Pipe Black Color Pbr 312 2bk The Home Depot

Roof Doctor Inc Roof Anatomy Lingo Raytown Mo Roofing Roof Repair Roofing Systems
Https Encrypted Tbn0 Gstatic Com Images Q Tbn 3aand9gcrzp0uymmygq74nwl5iad9kt X1ji2xmtcsdwo3jcvw5ldiea2i Usqp Cau

Roof Removal How To Tear Off Roof Shingles Roof Repair Roof Shingles Roof Cost

Quickseam Pipe Flashing Boot Youtube

Flat Roof Drains Kessel Leading In Drainage Roof Drain Flat Roof Flat Roof Repair

Duravent Chimney Pipe How To Install A Duravent Chimney Roof Flashing Youtube

Image Result For Joining A Flat Roof To A Pitched Roof Flat Roof Roof Shingles Roofing
Source : pinterest.com
